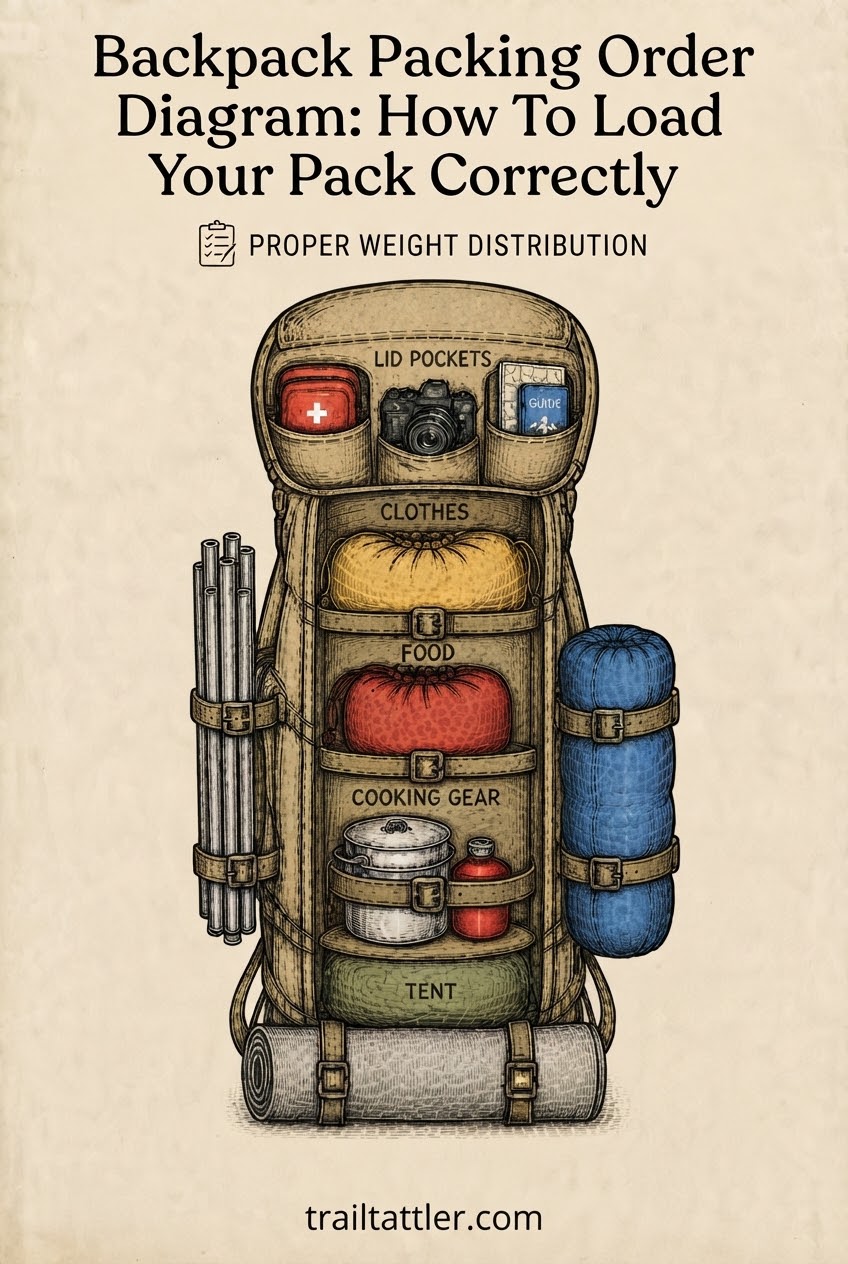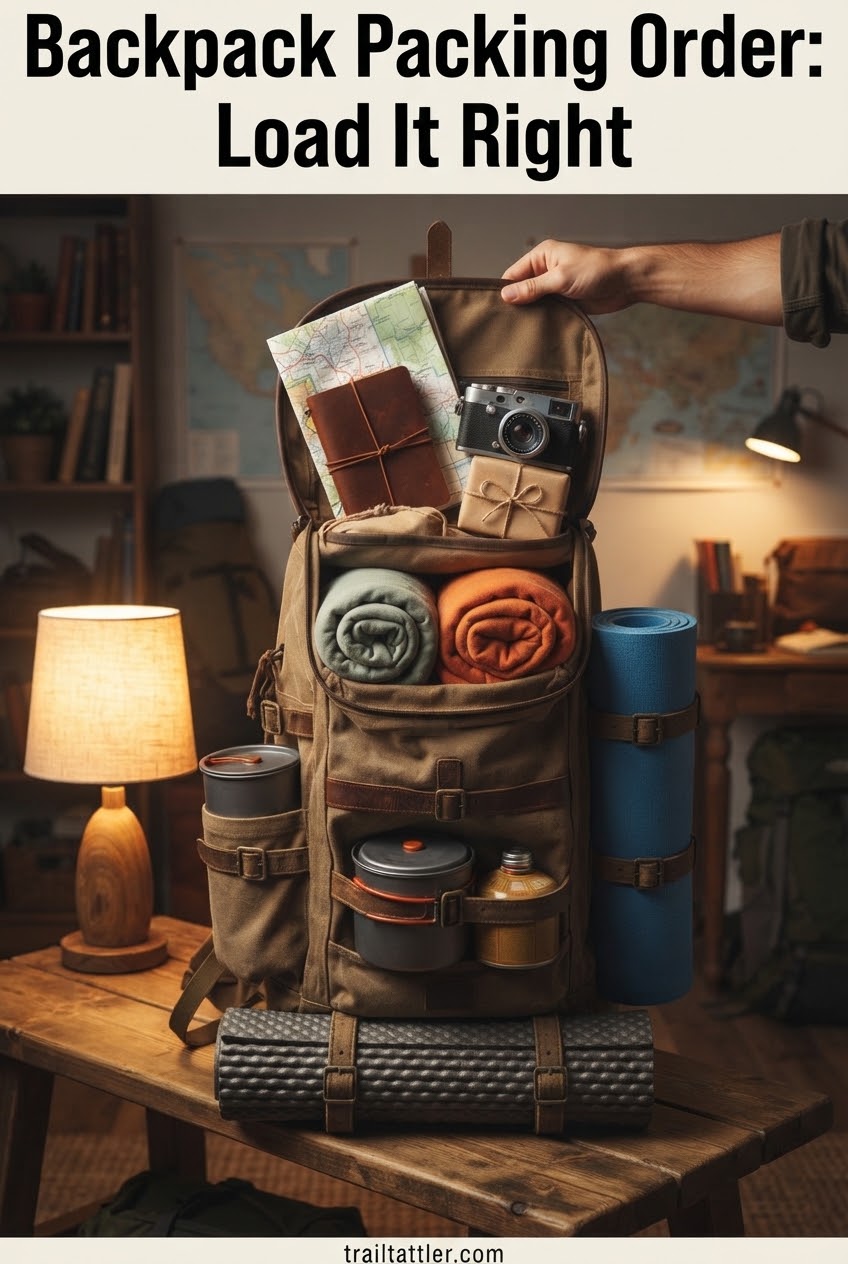
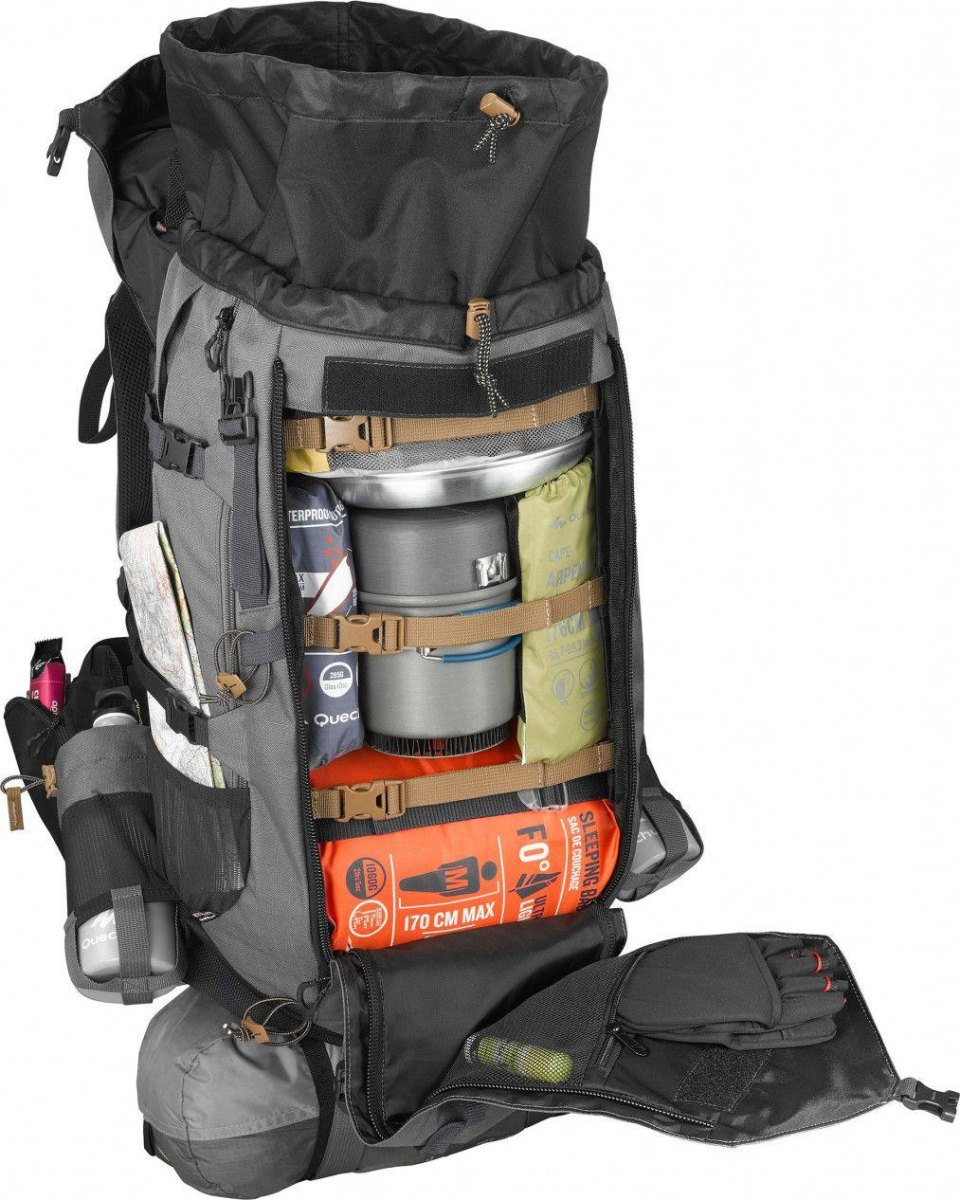
I used to just cram gear into my pack in whatever order it came out of the gear room, and I paid for it on a rainy overnight in the Smokies when my tent was buried under a stove I needed at 4 p.m. and didn't need again until dark. This backpack packing order diagram is basically the system I've settled into after that trip and a few hundred more — heavy and bulky low, food and fuel in the middle where you can reach it, clothes on top to cushion the load, and the small stuff riding in the lid where your hands actually go first. It's not complicated, but the order matters more than people think.
Lay It All Out Before You Touch the Pack
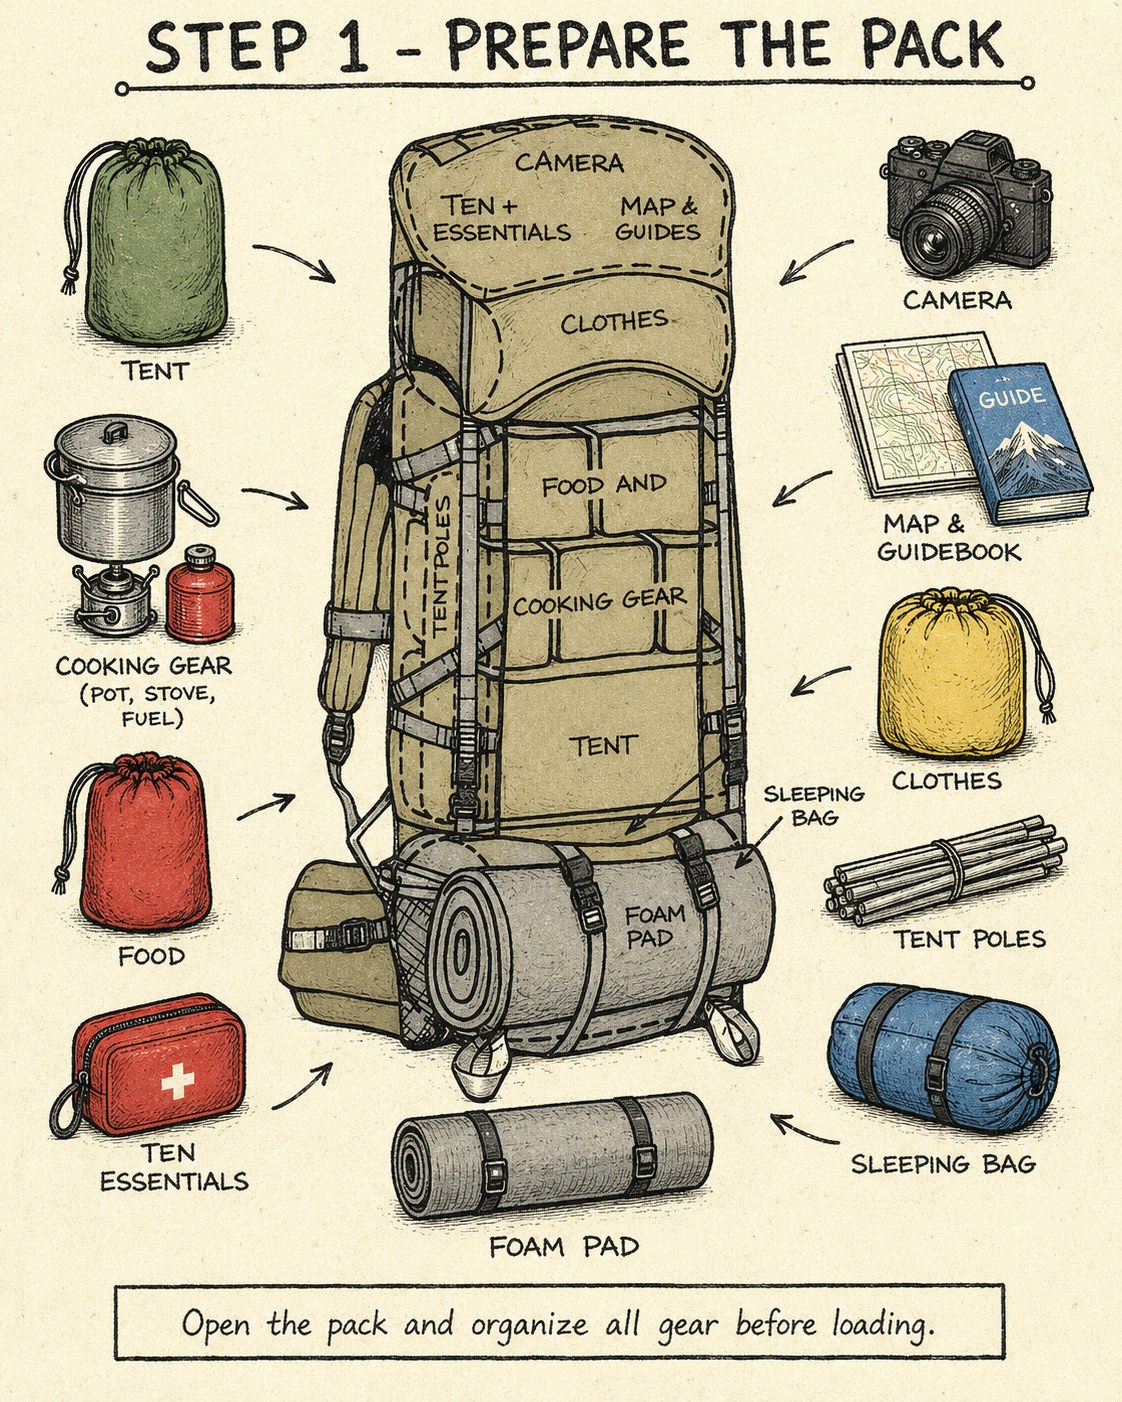
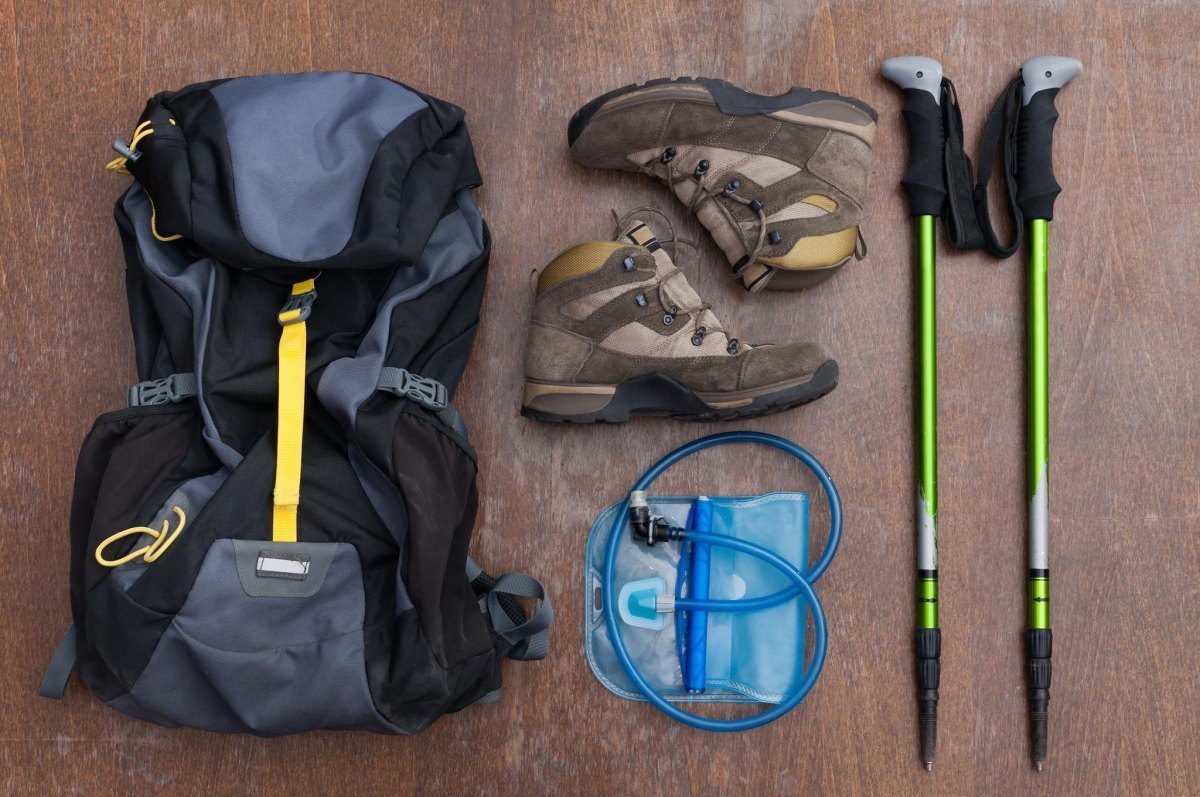
Before anything goes in, I dump every piece of gear on the floor of the gear room and look at it — tent, poles, sleeping bag, foam pad, cook kit, food bag, clothes stuff sack, camera, map and guidebook, and my ten essentials pouch. This is the step people skip, and it's the one that saves the most time later.
Staging it all out means I can see what's missing before I'm at the trailhead, not after. It's the same habit I picked up fitting boots and processing warranty returns for eight years in outdoor retail — the failures you catch on the bench never happen on the trail.
- Sort by category first: shelter, cooking, food, clothing, safety, extras.
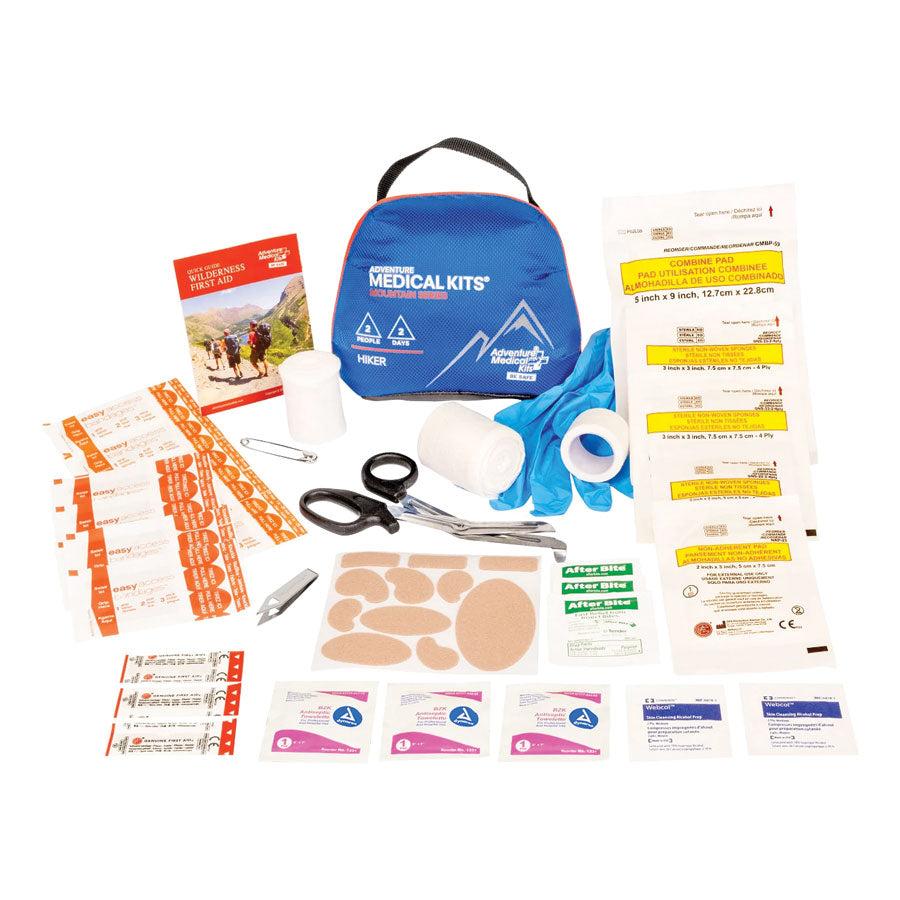
- Check the ten essentials pouch separately — headlamp, navigation, first aid, the works.
- Weigh anything you're unsure about before it goes anywhere near the pack.
Every gear failure I've seen on a callout started at home, not on the trail — a headlamp left on the counter, a map never checked.
The Tent Goes in First, Down Low
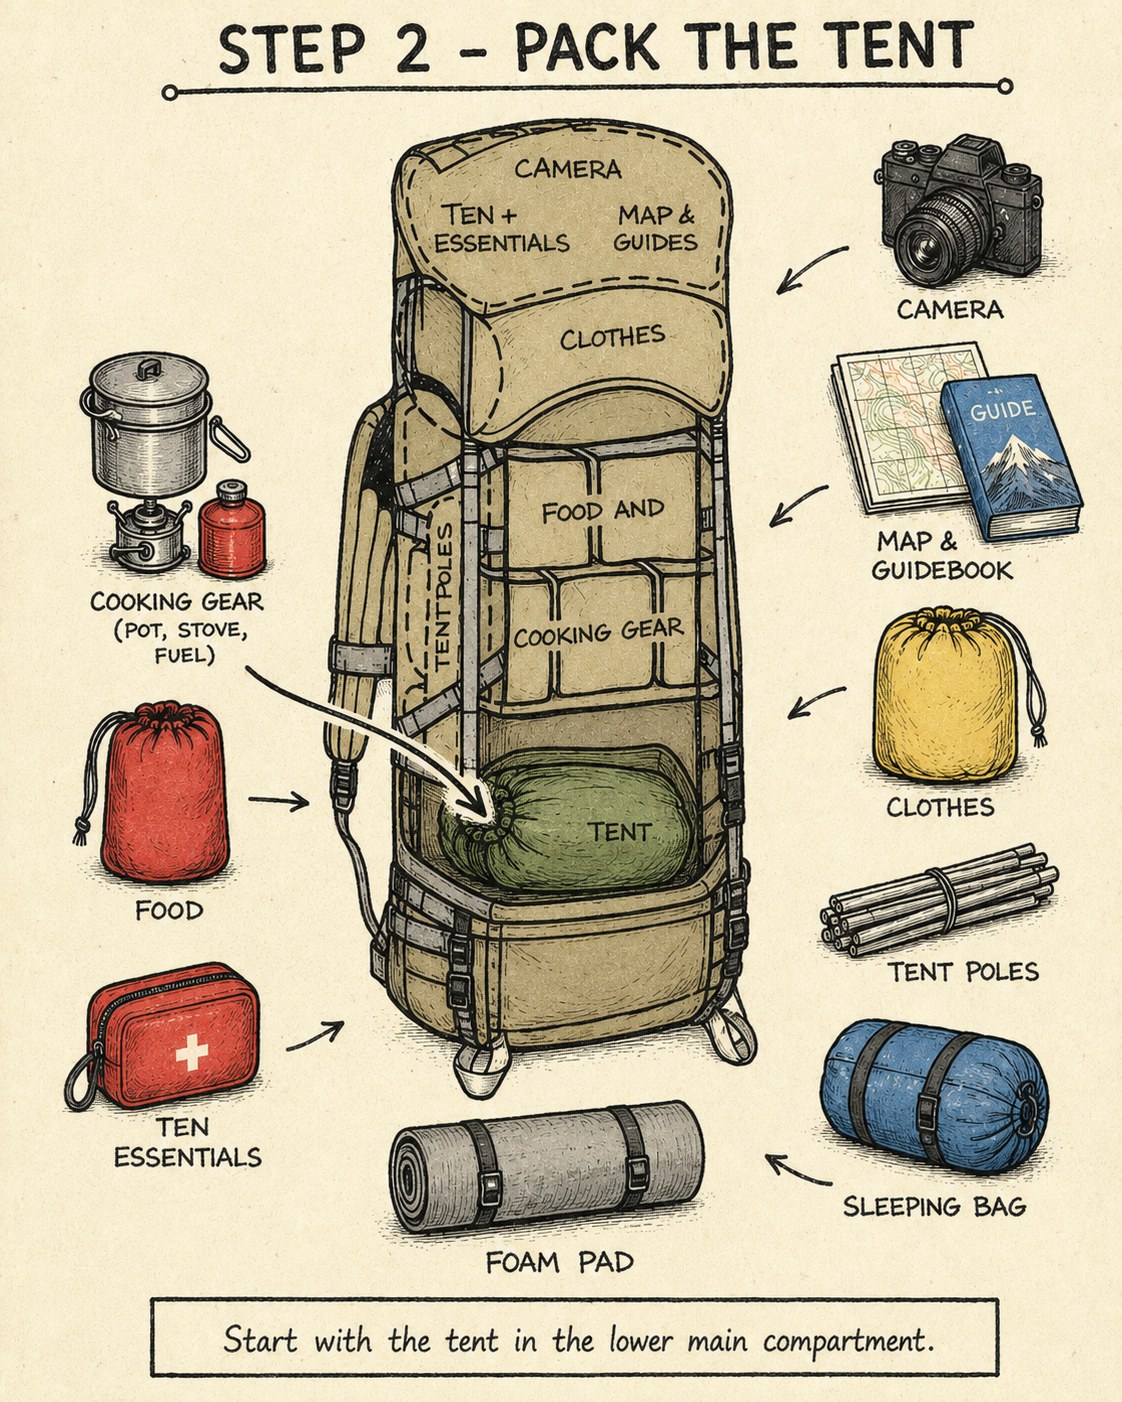
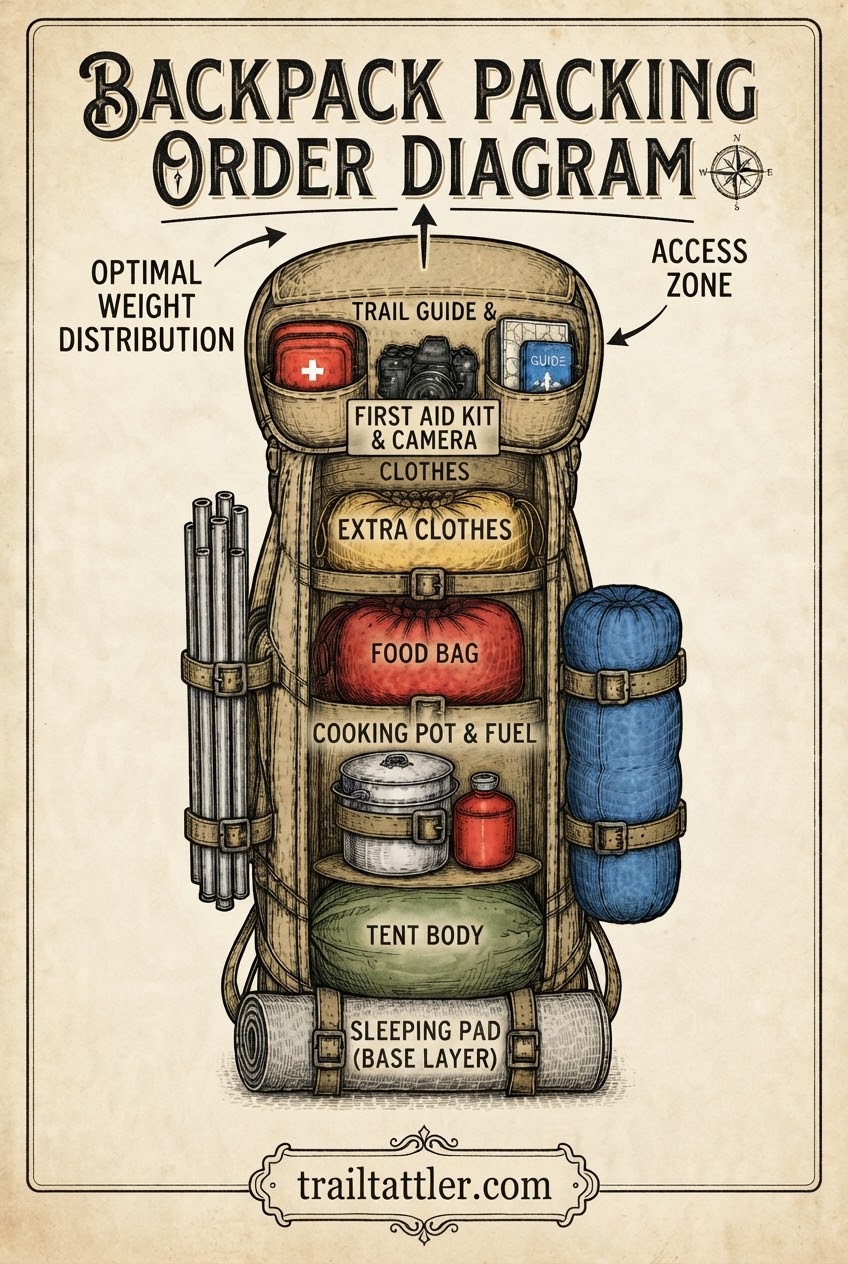
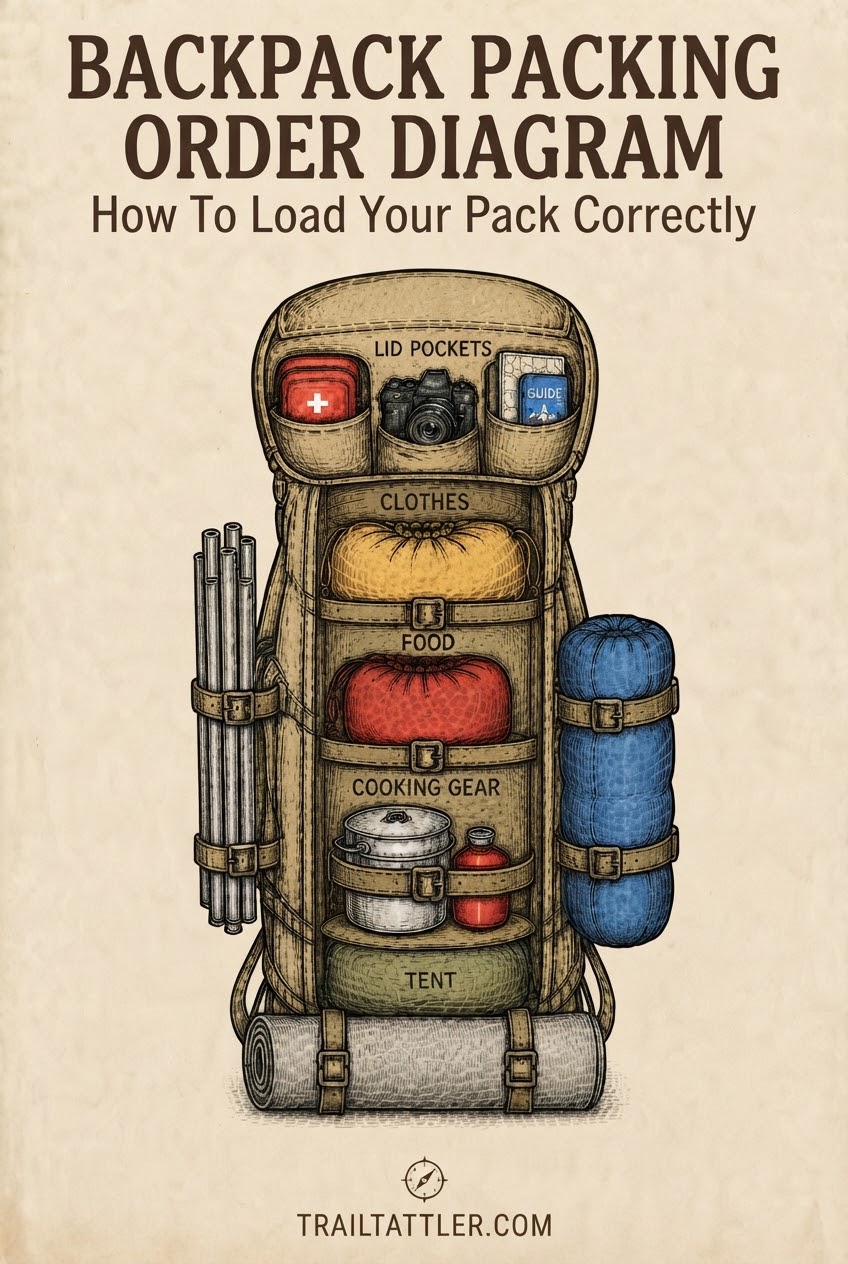
Once everything's staged, the tent body goes into the bottom of the main compartment first. It's bulky, it's not something I need until camp, and it compresses down into a soft, stable base that the rest of the load can sit on without shifting.
I keep tent poles strapped to the outside rather than buried inside — more on that later — but the tent fabric itself, stuffed rather than folded, fills the bottom corners better and wastes less space than a neatly rolled sack ever does.
If your tent won't compress small enough to leave room above it, that's usually a sign you need a smaller stuff sack, not a bigger pack.
Cooking Gear Sits Right Above the Tent
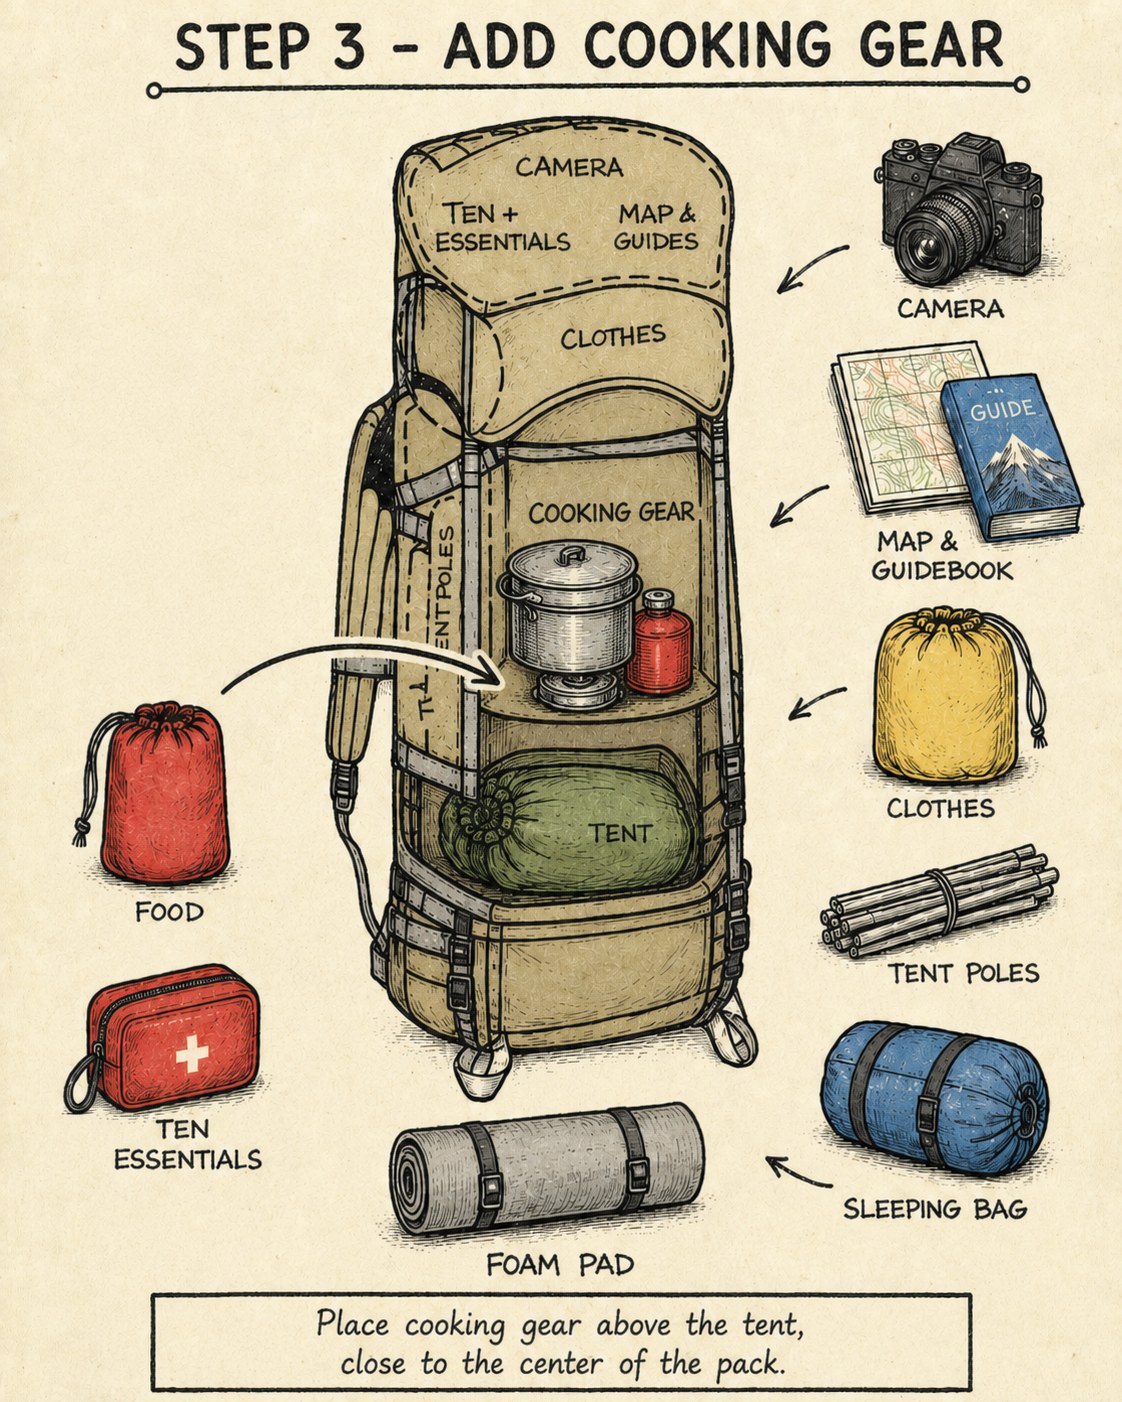
Next up is the cook kit — pot, stove, fuel canister — stacked directly on top of the tent, close to the center of the pack. This is the point where weight placement starts to matter for how the pack actually feels on your back, not just how it looks packed.
Why center, not top or bottom
Heavier, denser items belong close to your spine and mid-back, which is exactly where cooking gear lands in this layout. Too low and the pack feels like it's dragging behind you; too high and it feels top-heavy and tippy on uneven tread — something I notice every time on loose sandstone scree around here.
I don't need my stove until I stop for the night, so it doesn't need to be quick-access. It just needs to be centered and secure.
Food and Fuel, Right Above the Cook Kit
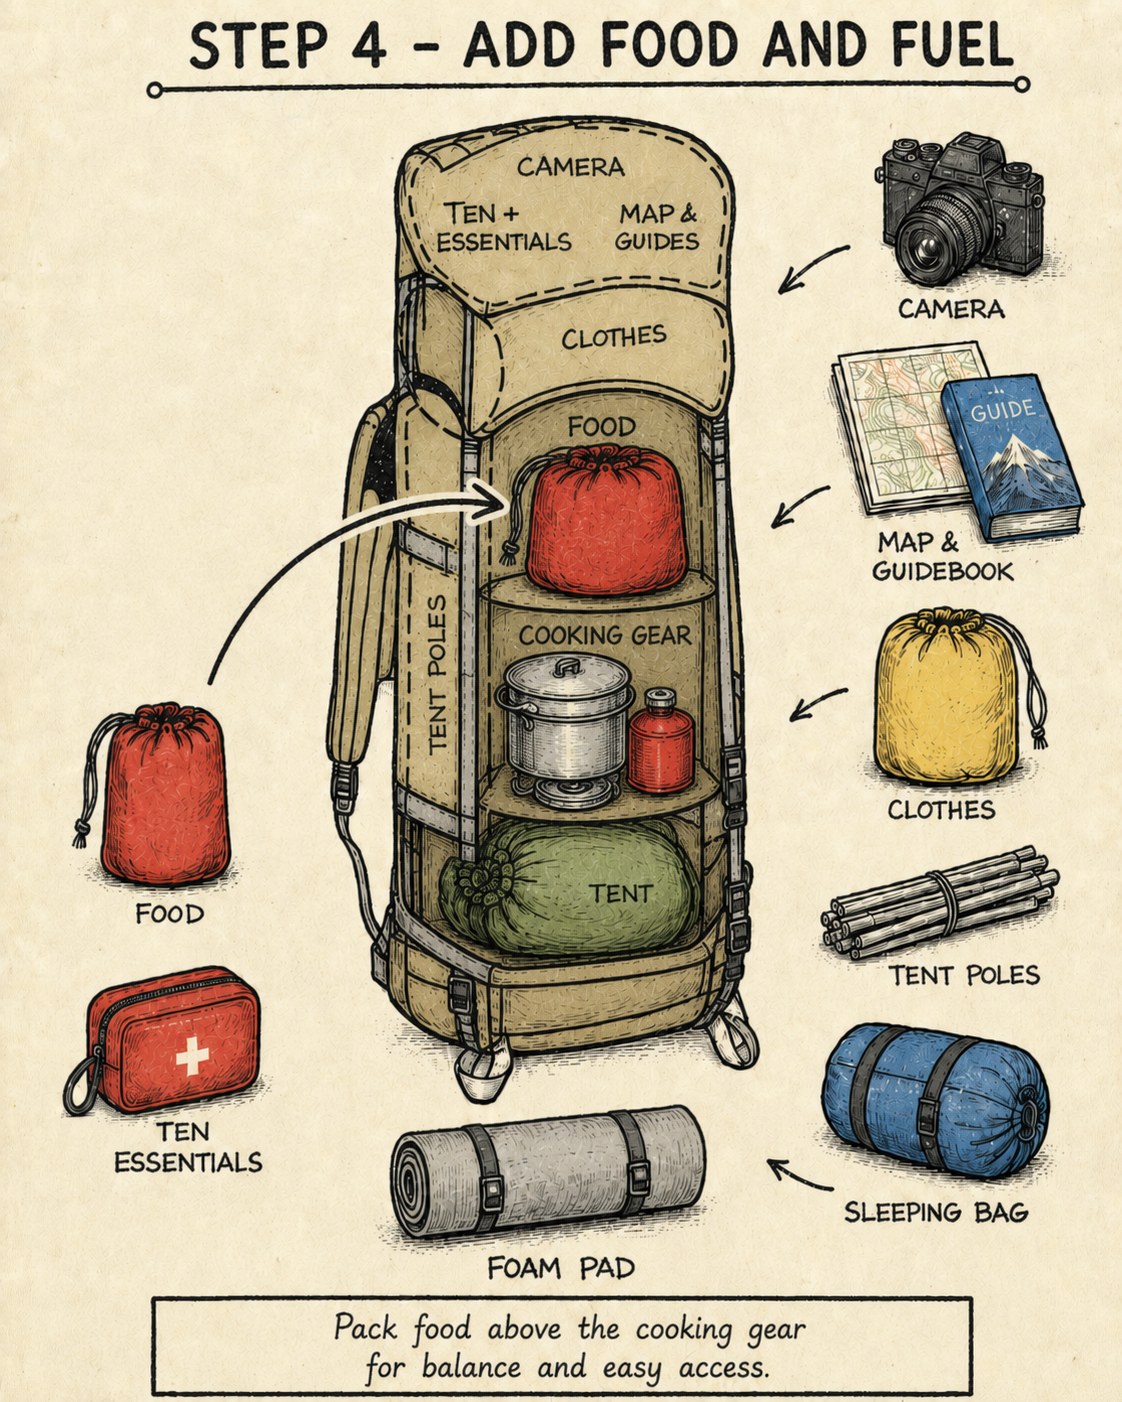
Food goes in next, directly above the cooking gear. This keeps the two things you'll actually use together — stove and food — stacked in the same reachable zone instead of scattered across the pack.
- Balance: food is often one of the heavier single items, so keeping it centered rather than high avoids a top-heavy pack.
- Access: it's easy to pull the food bag without unpacking your whole load for a mid-hike snack.
- Bear country note: where canisters are required, this general order still applies, but the canister itself often needs to sit differently — check the specific regulations for wherever you're headed before you assume this layout works as-is.
This is the layer where I've made mistakes before — packing food too high threw my balance off on a steep switchback descent in the Cumberland Plateau, and I felt it the whole way down.
Clothes Fill the Top of the Main Compartment
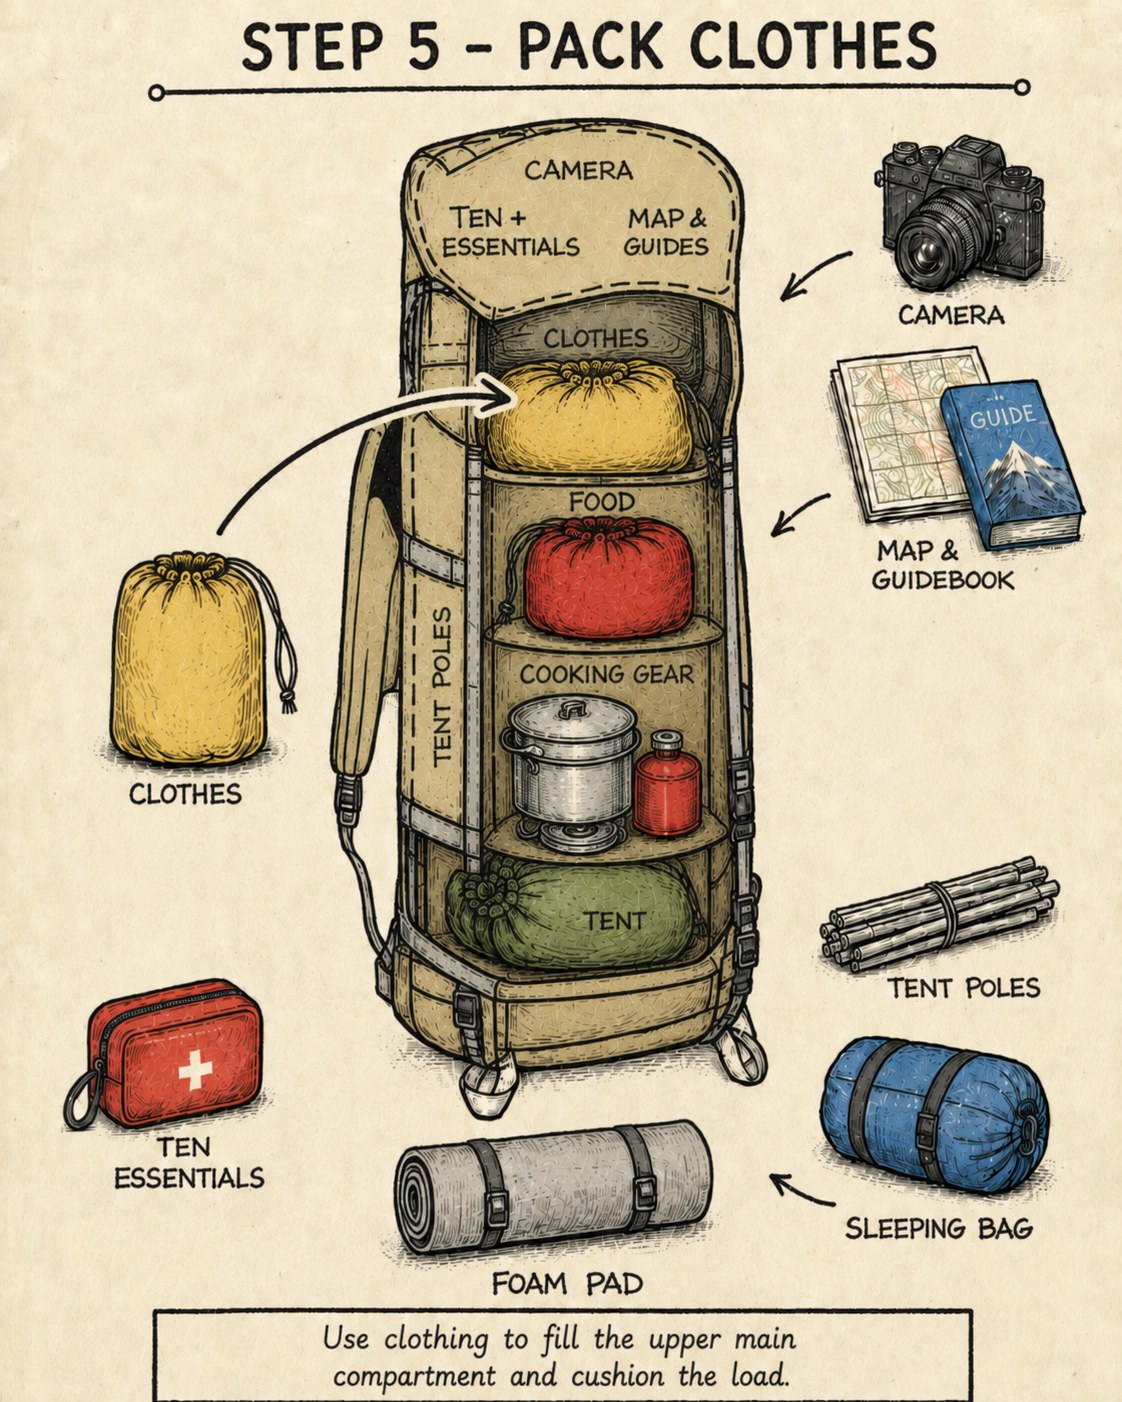
Clothing goes in last inside the main compartment, filling the space above the food bag and cushioning everything underneath it. This is the softest, most compressible layer, and it's forgiving if you overpack it slightly.
I stuff mine rather than fold it — folded clothes leave gaps, stuffed clothes fill the odd corners a rigid stuff sack can't reach. It also means my rain layer or extra insulation is close to the top, which matters more than people think when the weather turns on the Plateau without much warning.
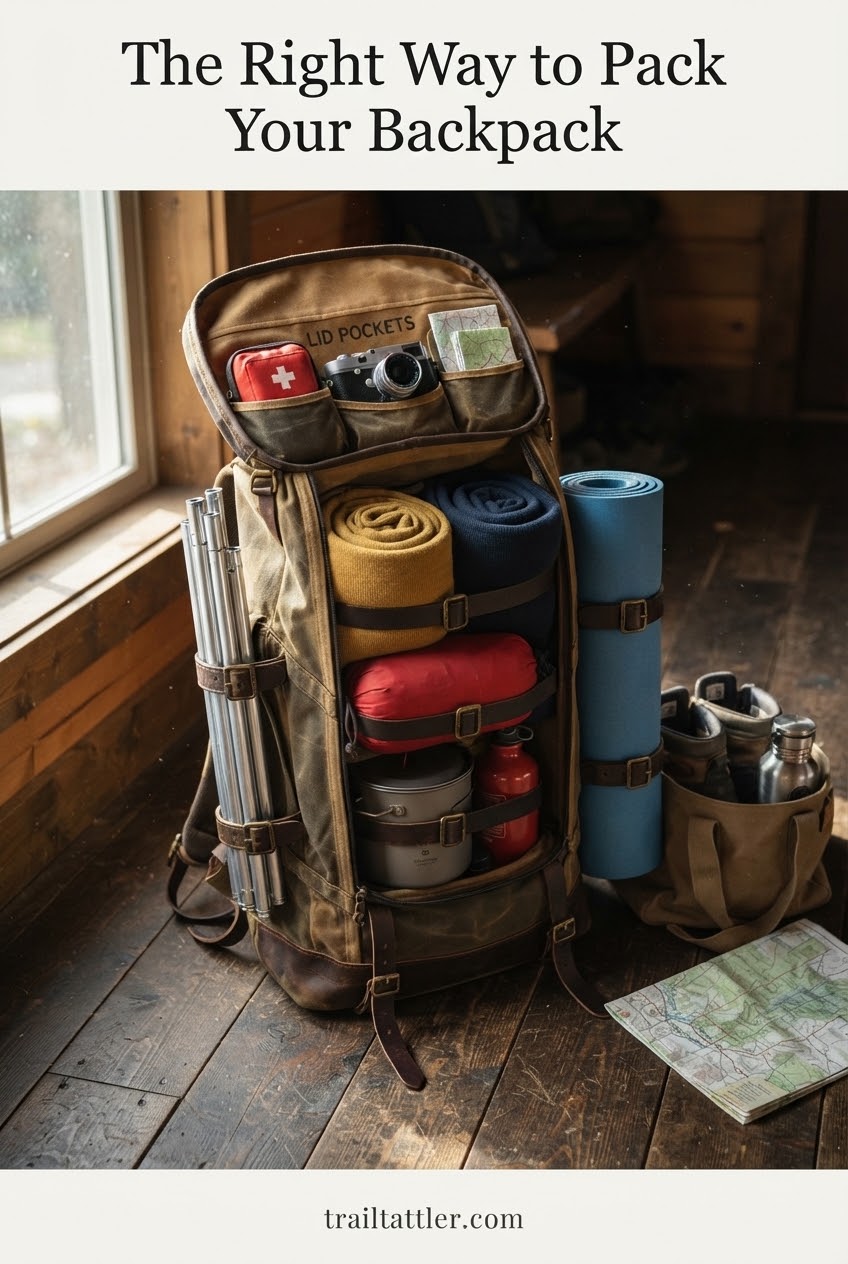
The result at this point: a pack that's dense and stable at the bottom, food-and-cook-kit centered for balance, and a soft, adjustable cushion of clothing on top holding it all together.
The Lid Pockets Hold Everything You Grab Without Stopping
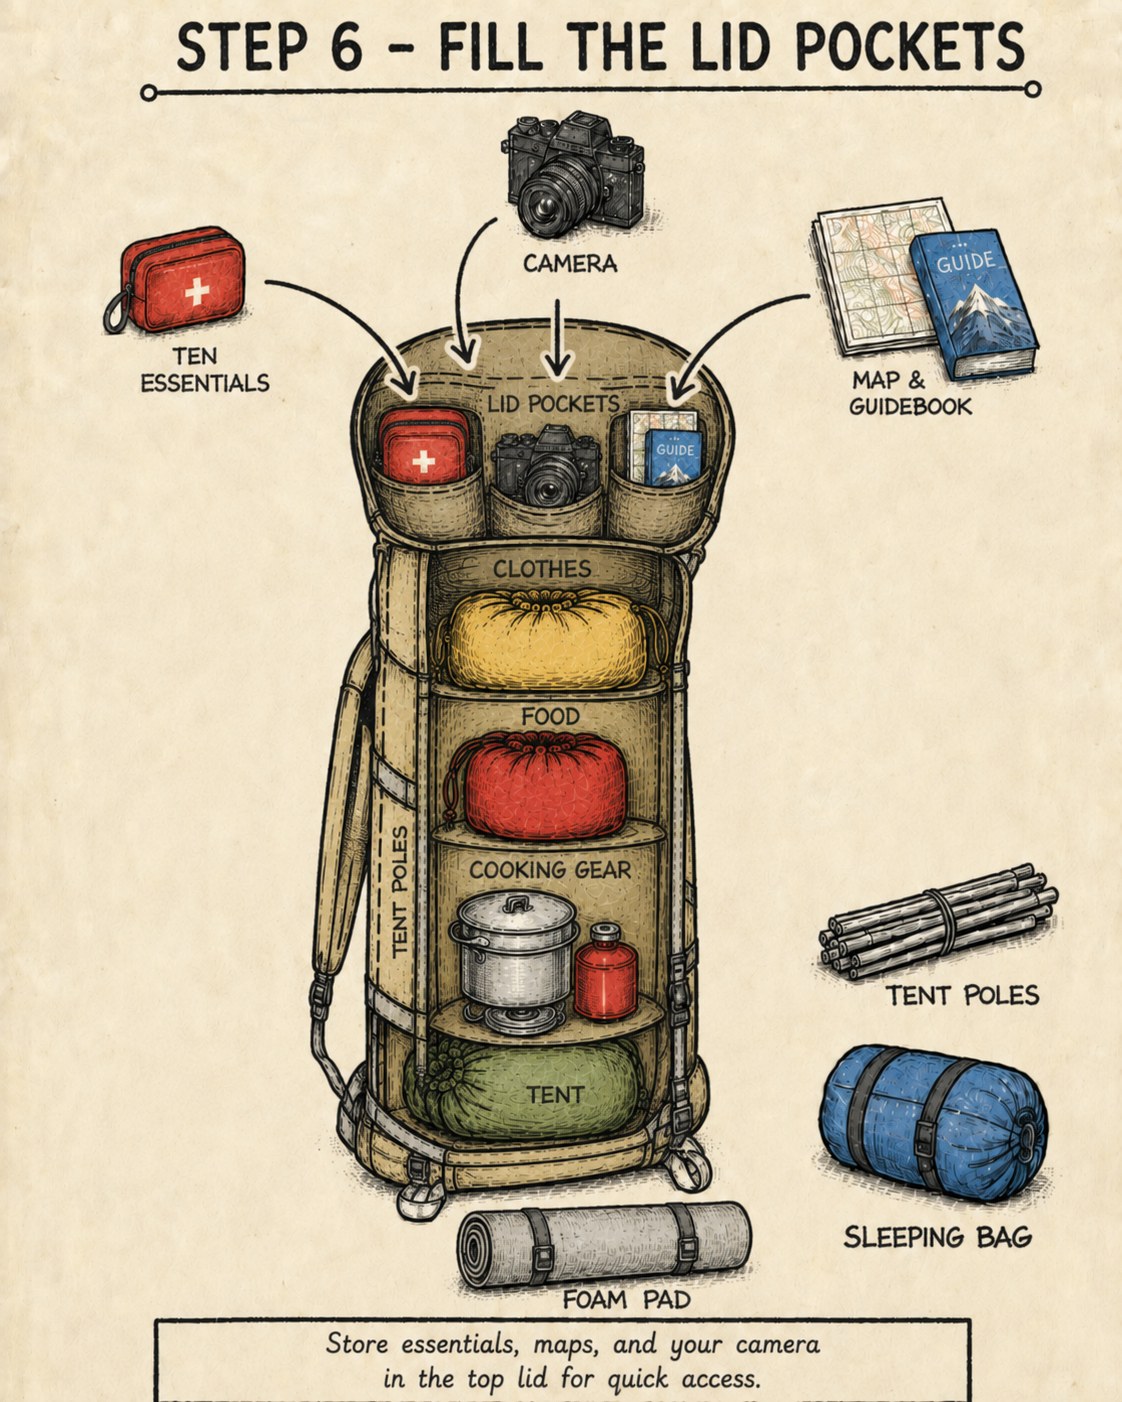
The lid is for anything you need without taking the pack off — my ten essentials pouch, camera, and map and guidebook all live here. This is the one compartment I never let get disorganized, because it's the one I reach for mid-stride, often one-handed, often while I'm already slightly annoyed about something.
My ten essentials pouch stays in the same lid pocket on every single trip — navigation, headlamp, sun protection, first aid, knife, fire, shelter, extra food, extra water capacity, extra layer. Most of the callouts I've helped on came down to somebody missing one of those, usually the headlamp, usually paired with a start that was an hour later than planned.
What I keep out of the lid
Nothing food-related stays up top overnight in bear country — smell management matters more than convenience there.
Poles, Sleeping Bag and Pad Ride on the Outside
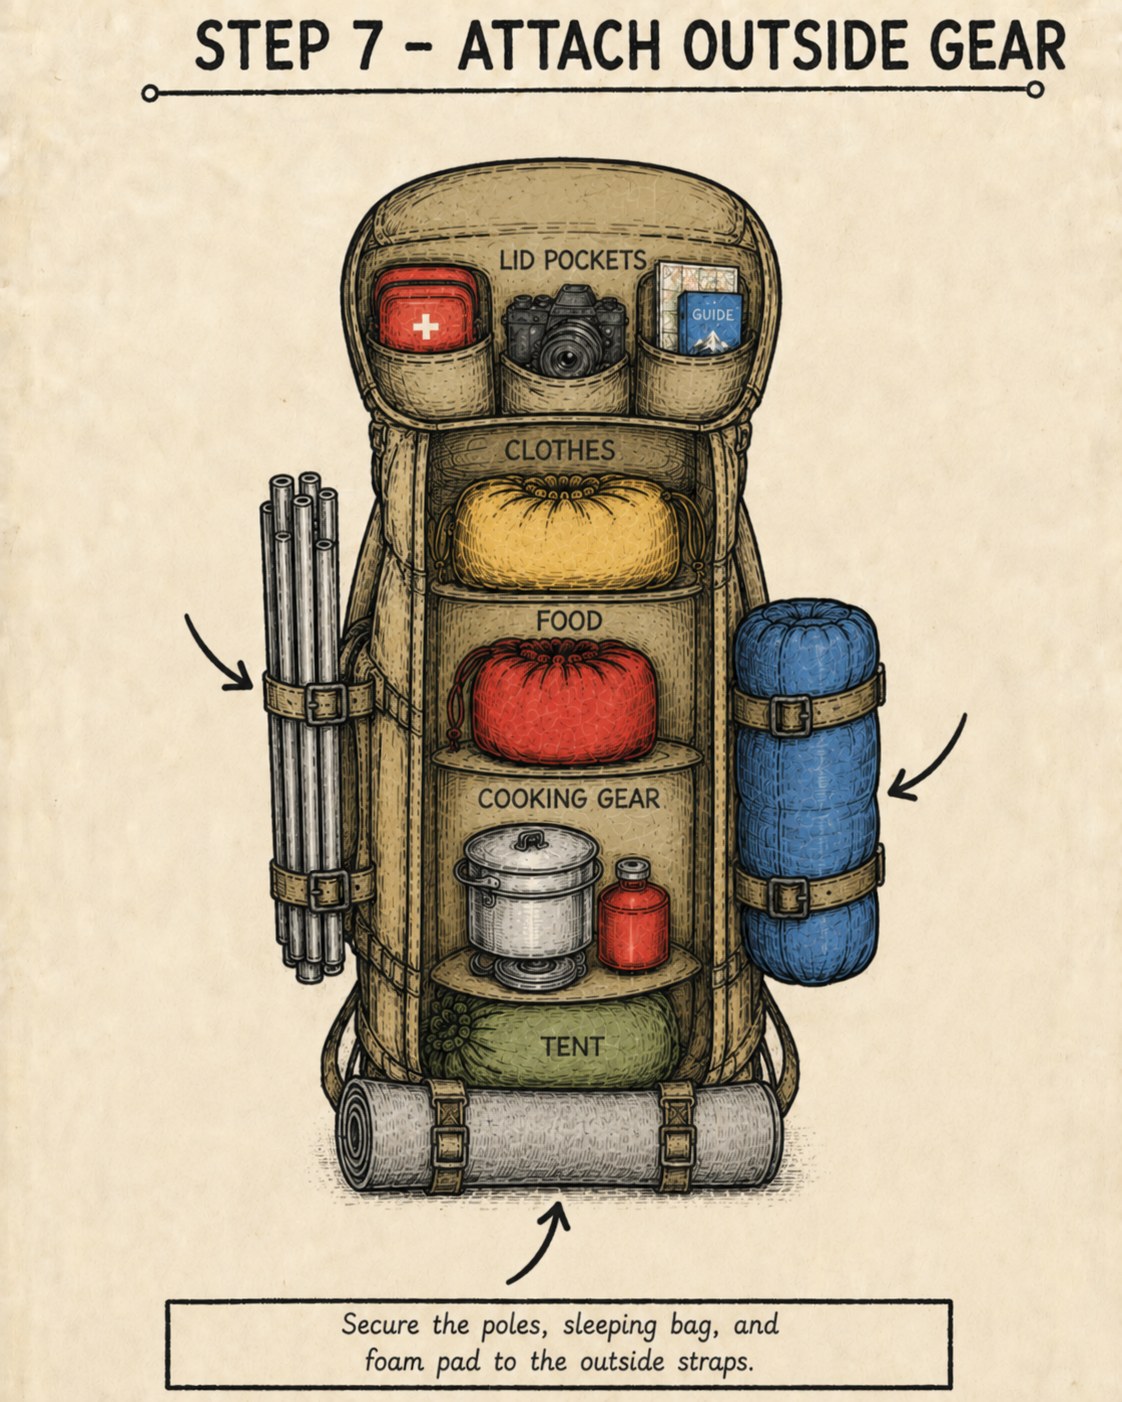
Tent poles get strapped along one side, sleeping bag compressed and lashed to the other, and the foam pad rides under the bottom of the pack on the compression straps. None of this goes inside the main compartment — it doesn't need to, and cramming it in there just fights you for space you've already allocated to everything else.
A few things I've learned the hard way about outside gear:
- Balance side to side — poles on one side, sleeping bag on the other, keeps the pack from listing.
- Compression straps, not just clip loops, should be doing the actual holding — clips fail on rough tread, straps rarely do.
- Check exposed gear at every break — a loose strap on brushy trail is how you lose a sleeping bag two miles back without noticing.
The Finished Pack, and Why the Order Actually Matters
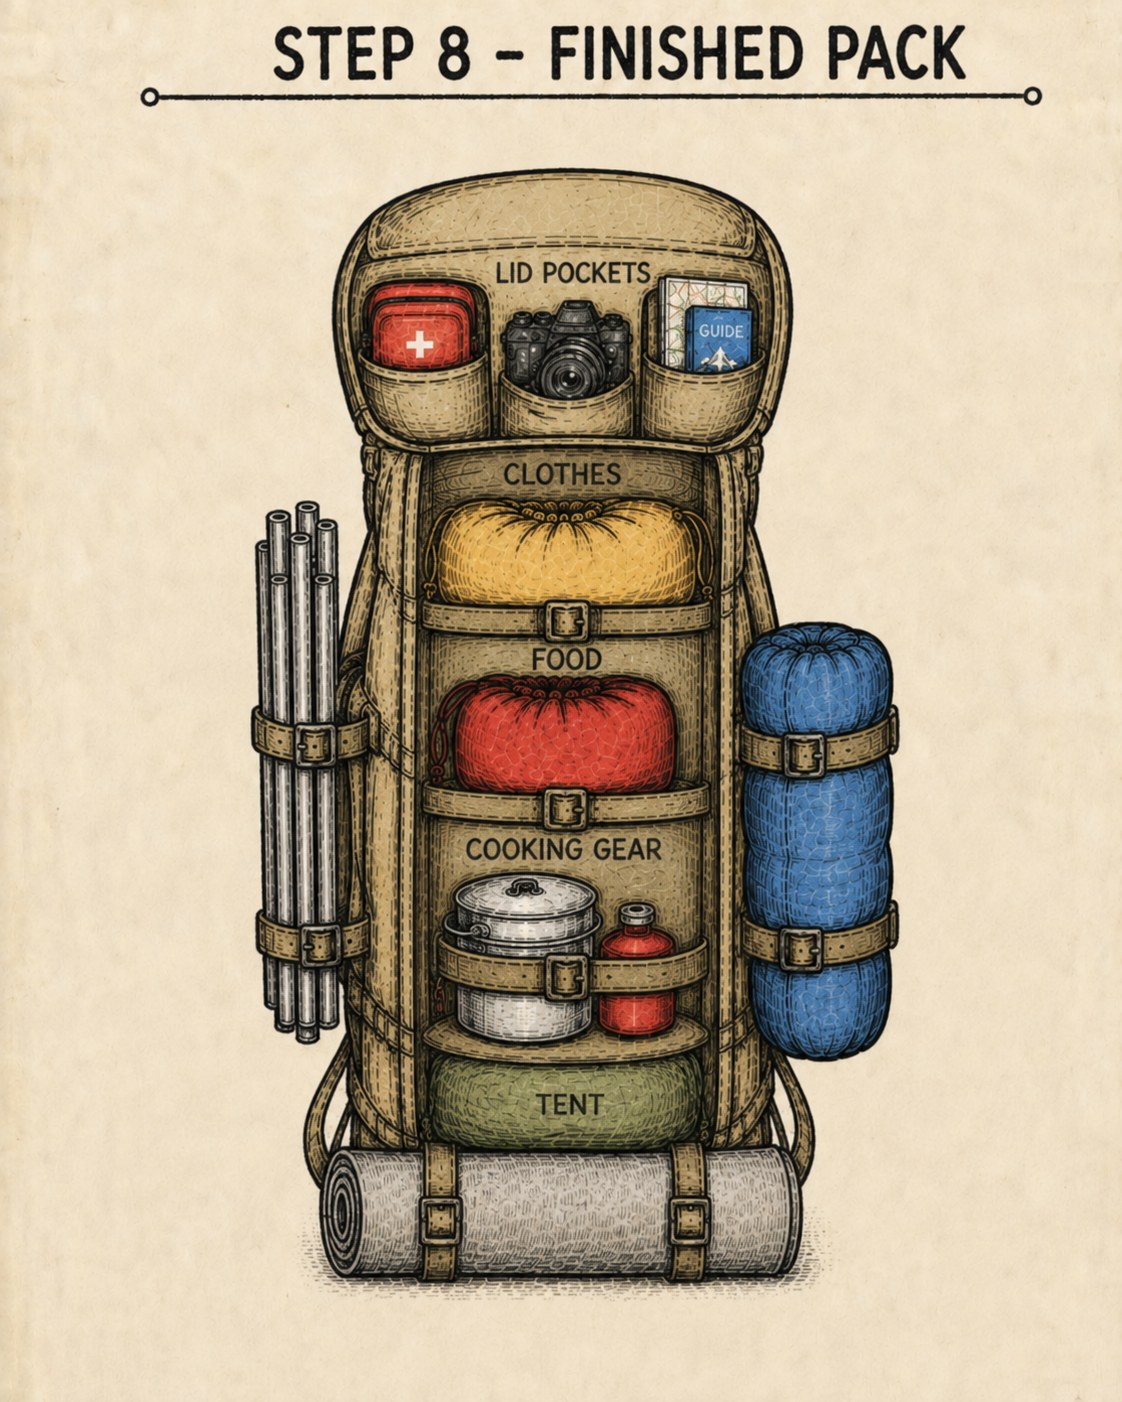
Here's the finished load: tent low, cook kit and food centered, clothes cushioning the top, essentials and camera in the lid, poles and sleeping bag lashed outside, foam pad underneath. It's a system, not a rule that can't flex — swap in a canister where required, adjust for a heavier winter layer — but the logic underneath it holds up trip after trip.
What this order actually buys you is a pack that carries its weight close to your back and centered rather than swinging low or leaning back, which matters far more on loose tread or a long descent than most people expect until they've felt the difference.
Before you shoulder it and walk off, tell someone your route and when you expect to be back — that habit has nothing to do with how the pack is loaded, and everything to do with getting home from it.
I still lay everything out on the gear room floor before every trip, even after a few hundred hikes' worth of practice, because the five minutes it takes catches the one thing I'd otherwise discover at the trailhead instead of at home.

- Gear to pack

Common Questions
Does this packing order work for any backpack size?
The logic — heavy and bulky low and centered, essentials in the lid, soft items cushioning the top — scales from a 35L overnight pack to a 65L multi-day load. What changes is how much you're stuffing into each zone, not the order itself.
What if my bear canister doesn't fit where the food bag goes in this diagram?
Canisters often need a different placement than a soft food bag, and requirements vary by park and forest. Check the specific regulations for wherever you're headed rather than assuming this general layout applies as-is.
Why does the tent go in first instead of the sleeping bag?
In this system the sleeping bag actually rides outside on the compression straps, so the tent takes the bottom of the main compartment because it's bulky, not needed until camp, and compresses into a stable base for everything stacked above it.